All lined up
When it comes to deciding on a design and colour palette for your home, incorporating strong lines within the aesthetic can make such a bold statement.
As a method used in architecture for centuries, decorative lines are masters of perception and work to stimulate the senses. The use of lines in interior design is also perfect for creating height or width, capture movement, enhance a statement wall or breathe new life into a piece of furniture.
Here are five ways to introduce painted lines to transform your interior.
1. Try colour blocking
Published: 18 Jul 2019
Do you have a home full of wonderful Resene paint and colour? Send us some snaps by emailing editor@habitatbyresene.co.nz.
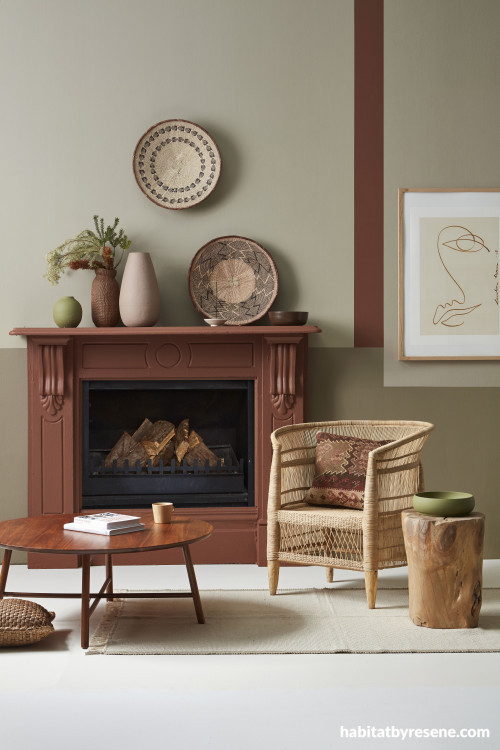
Resene Grey Olive, Resene Napa, Resene Earthen and Resene Route 66 have been used to creatively create structure and height on the walls of this lounge. The floor is painted Resene Quarter Spanish White and the bowls and vases are in Resene Crowdpleaser, Resene New Leaf, Resene Tablelands and Resene Barnstorm.
Strong vertical lines are great for adding visual lift and height to a room, encouraging the eye to look upward – and using geometric blocks of colour through paint is a great way to achieve this.
A mixture of earthy tones has been artistically blocked out on the walls of this lounge, with a striking result. Inspired by a bird’s eye view of a rural landscape, Resene Grey Olive, Resene Napa and Resene Earthen are given strong structure with a stripe of Resene Route 66, which has also been used on the fireplace. For best results, bring the same colours further into the room through painted furniture and accessories, such as tables or vases, as well as soft furnishings like cushions and throws.
2. Spruce up some old furniture
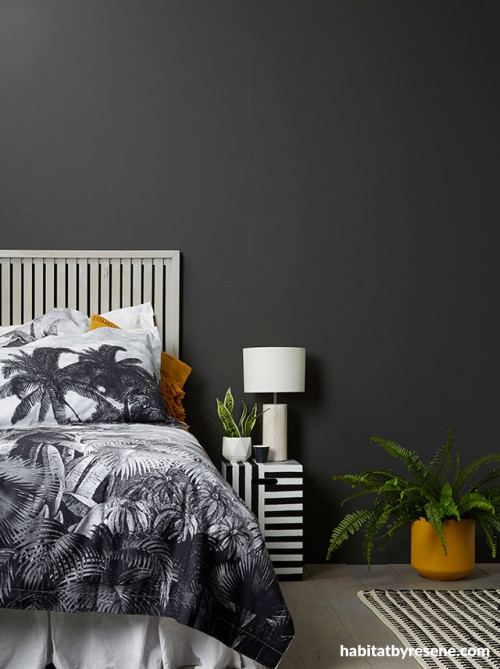
With just a roll of masking tape and a couple of testpots in Resene Charcoal and Resene Poured Milk, this peg stool was transformed into a room defining feature. The wall is painted Resene Porter and the plant pot is in Resene Cleopatra. The wooden slat bedhead is stained Resene Colorwood Light Greywash while the timber flooring is in darker Resene Colorwood Mid Greywash.
Renovating old furniture can breathe new life into an interior while also extending the life of the piece itself. A peg stool or a simple bedside cabinet are easy makeover items that lend themselves well to a graphic striped design like this one.
Simply paint 2-3 coats of your chosen base colour then use the width of your masking tape to block off your stripes and paint the spaces in between with your second colour choice. This stool alternates Resene Charcoal with Resene Poured Milk for a high contrast scheme, and the choice to run half of the lines in a perpendicular direction makes for an even more interesting look. Tie it in with soft furnishings and accessories in repeating colours and patterns to complete the look.
To try create your own for your place, check out the step-by-step instructions here.
3. Split up a space
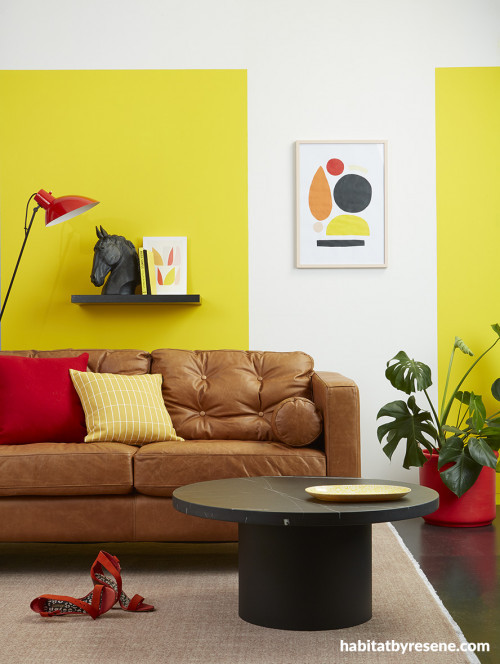
This yellow living room has a fun and energetic vibe thanks to its combination of Resene Turbo and Resene Black White on the walls along with accents in Resene Roadster and Resene Noir. The mid-mod inspired DIY artwork was created using testpots of Resene Roadster, Resene Jailbreak, Resene Turbo, Resene Noir and Resene Sorbet.
This two-toned look not only gets elevated with a vertical split, which adds structure and height to the space, but the design also creates a stage for a statement piece of artwork to shine. The use of the two contrasting colours breaks up the monotony of a large white wall while also keeping the yellow from completely overpowering on its own.
In a large open-space plan, you can also use paint colours in a similar way to divide up different areas by task – or define a personalised area, such as in a shared kids’ room.
For a less courageous look than the one above, try two tones of the same hue, such as Resene Secrets with Resene Helix, Resene Double Ash with Resene Stonewashed or Resene Fast Forward with Resene Artemis. You could also try the same colour in two different strengths, such as Resene Half Tea with Resene Eighth Tea.
Top tip: For the best result, measure, use a level and draw your lines on the wall with a pencil before masking out your painted areas.
4. Bring in a sense of movement
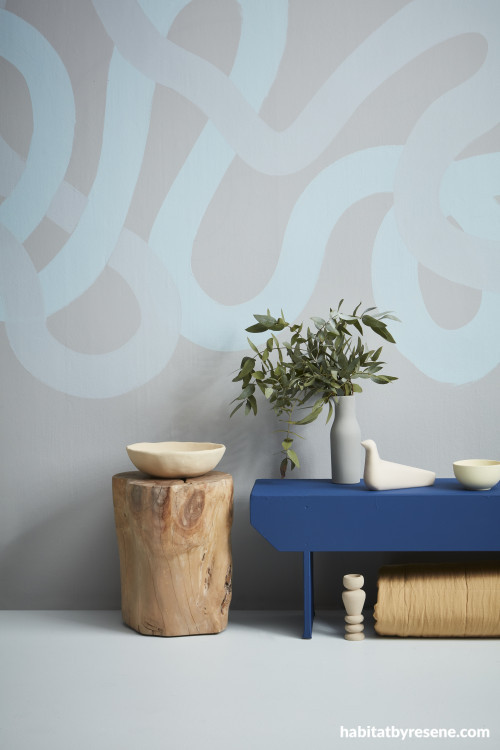
Curvy ribbons of Resene Mystery and Resene Remember Me loop over a wall in Resene Grey Seal. The bench makes a bold statement in Resene Bewitched and the floor lightens things up a little in Resene White Island.
Get creative and swap out vertical or horizontal lines for striking curved or circular lines. Easy on the eyes, soft lines offer rhythm and movement to an interior and work well on an accent wall.
But, if you’re feeling a little apprehensive about introducing bold statement lines, try a light hue that complements the original colour of the wall for a more subtle appearance. In the room above, curvy ribbons of Resene Mystery and Resene Remember Me whimsically loop over a wall painted Resene Grey Seal. Tie it into the rest of the space with smooth, circular shaped accessories to bring repetition into the room.
Top tip: Plan your design out first on paper before marking it out on the wall with a pencil. Once you’re happy with it, paint it on with a small roller – or use a brush and a steady hand.
5. Build an ombre effect
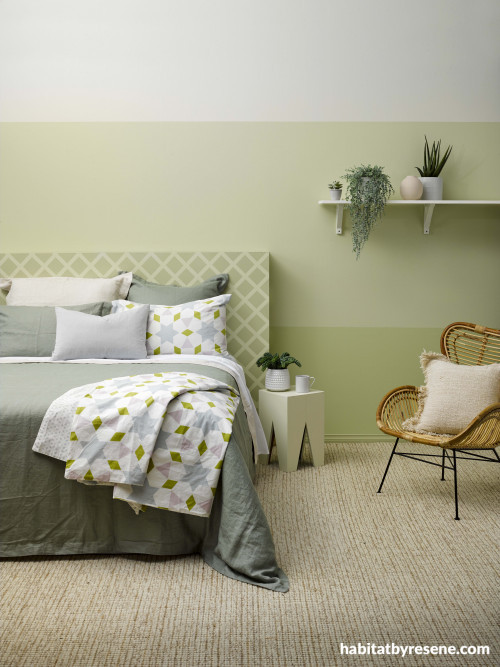
The walls of this restful bedroom have been given an on-trend ombre effect in (from top to bottom) Resene Travertine, Resene Miso and Resene Nirvana. The lattice headboard is in Resene Fawn Green and Resene Miso, the peg stool is in Resene Coconut Cream and the shelf is in Resene China Ivory.
Another great way to add interest to any wall is to use painted lines horizontally. Not only is it a cool look, it can actually make the room feel wider and more spacious.
This on-trend green scheme has been taken to the next level with a three-toned ombre wall effect in Resene Travertine on the upper portion, Resene Miso in the middle and Resene Nirvana at the bottom.
As an added bonus, lines have also been added in a lattice pattern to the headboard by first sanding and cleaning the surface of the headboard then painting it with Resene Miso. Once the basecoat is completely dry, measure and mask out the pattern before painting 2-3 coats of Resene Fawn Green on top. Carefully remove the tape using a craft knife to get the cleanest edge.
styling Gem Adams, Emily Somerville-Ryan, Kate Alexander
images Bryce Carleton, Wendy Fenwick, Melanie Jenkins

Resene Quarter Spanish White


Resene Quarter Spanish White

Resene Coconut Cream


Resene Coconut Cream
the look
If you're stuck on what
colour to use or need colour
advice, try out the Resene
Ask a Colour Expert service.

Resene Quarter Spanish White


Resene Quarter Spanish White

Resene Coconut Cream


Resene Coconut Cream
the look
If you're stuck on what
colour to use or need colour
advice, try out the Resene
Ask a Colour Expert service.


 look book


