
latest
habitat tv

Say goodbye to the morning scramble for keys, coats and sunglasses and hello to this… see this and more videos
blog

Reader roundup: A tiger themed bedroom, a cottagecore bathroom and feathery friends
We’ve got a great roundup of projects from our readers this month. From a rainbow… more

Bean there, hung that: DIY coffee cup holder
06 Aug 2024
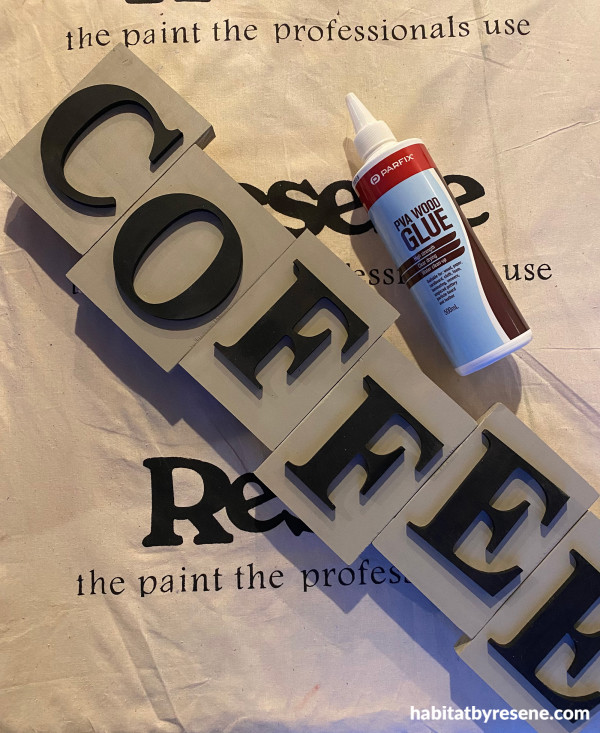
Whether you’re running out of space for all your mugs or just want to show off your best collection of coffee cups, this DIY cup holder is both stylish and functional. It also doesn’t take up any extra bench or cupboard space – because it’s conveniently on the wall! We used stylish neutrals to blend in with our neutral colour scheme, but you can go as colourful as you like. Grab your favourite Resenetestpot shades and get creative!
You will need:
- 1x piece of pine which is 57cm in length and 6cm wide and 2cm thick
- 1x piece of pine which is 60cm in length and 14cm in height and 2cm thick
- Wooden letters to spell COFFEE
- Wood glue
- Large black screw in hooks
- Testpot brush
- Ruler
- Pencil
- Drop saw or jigsaw
- Resene testpots in your chosen shades. We used Resene Black and Resene Tea
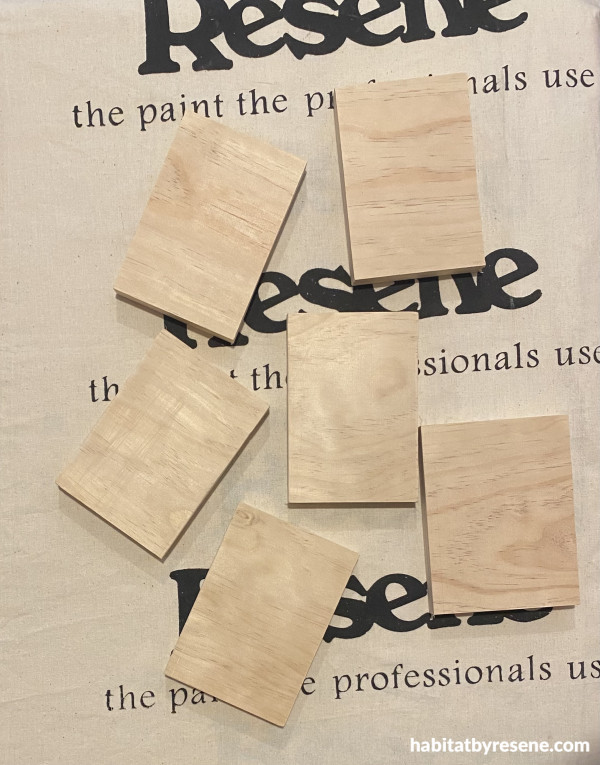
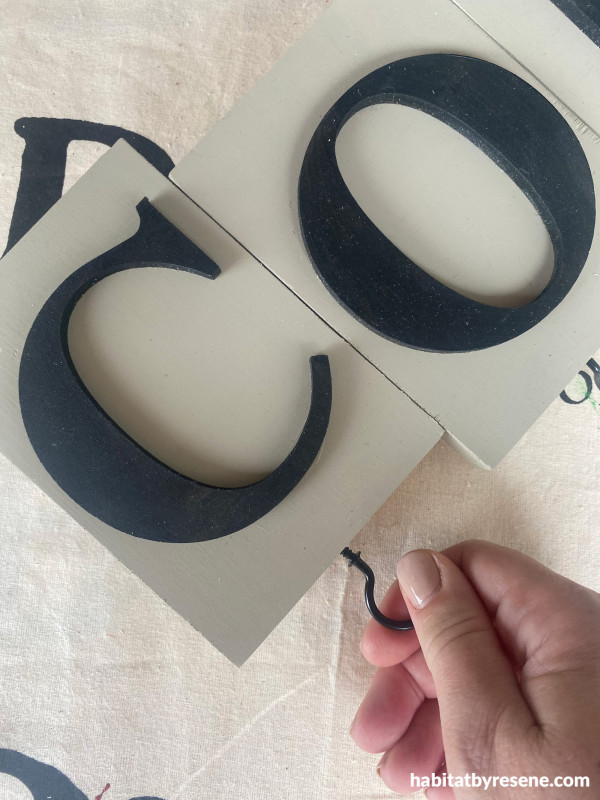
Step 1: Mark your wood pieces with pencil ready to cut. You will need five pieces of pine at 9.5cm in width and 14cm in height, and one piece which is 10.5cm in width (this is for the letter O as it is the bigger letter). Using a drop saw or jigsaw cut your wood pieces and give the ends a light sand.
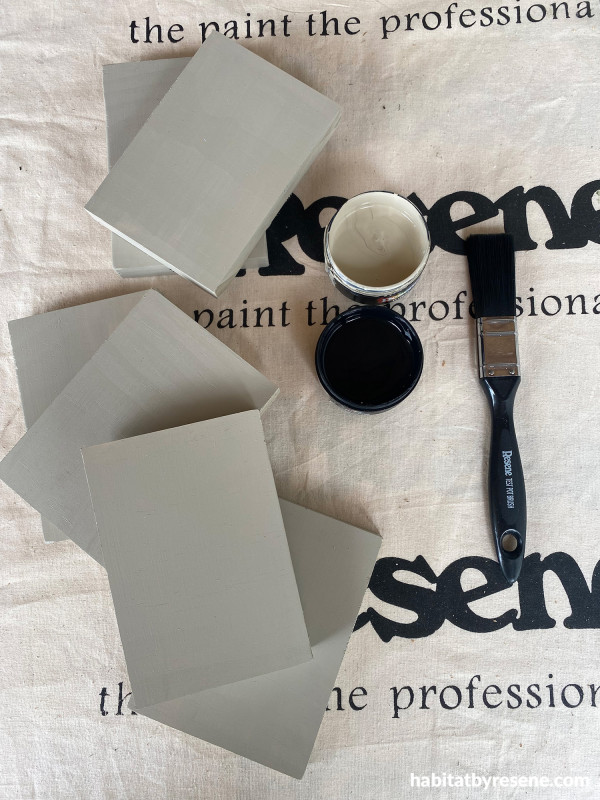
Step 2: Paint your wooden pieces in two coats of your chosen Resene colour. We used Resene Tea.
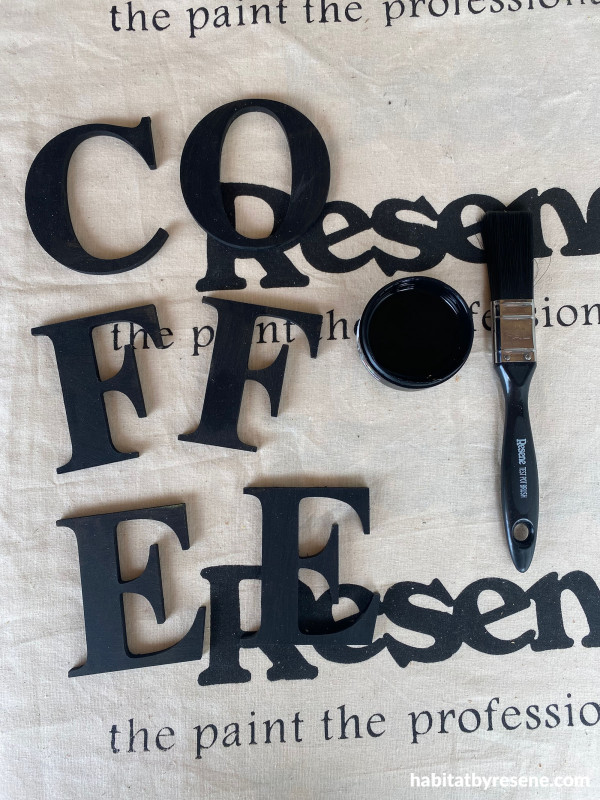
Step 3: Paint the COFFEE letters in your other chosen colour. We used two coats of Resene Black for a nice contrast. Remember to allow dry time between coats.
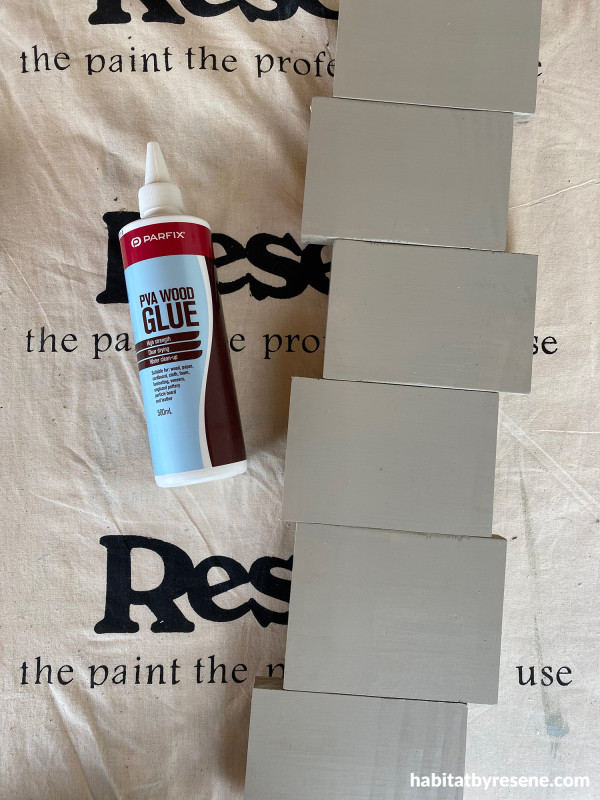
Step 4: Glue each wooden block to the next block slightly staggering them (some up, some down).
Step 5: Glue your letters onto the wood pieces using wood glue.
Step 6: Turn the glued wooden blocks so they are face down and glue the other piece of pine across the back of the glued blocks and attach the flat hanging picture hooks to the back.Then, screw in the black hooks under each letter.
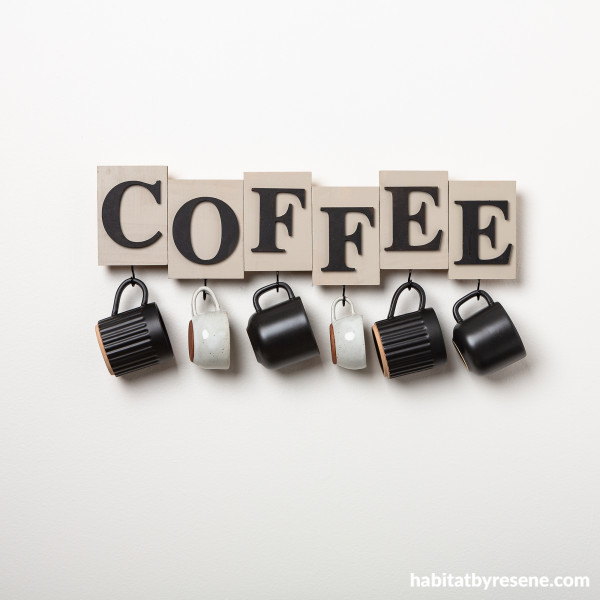
Step 7: Hang on the wall in your kitchen, add your cups and enjoy your next cup of hot goodness!
Wall painted in Resene Rice Cake.
project Vanessa Nouwens
image Bryce Carleton
Published: 06 Aug 2024
more inspiration

A spot-on way to count: DIY math lady bugs
Turn scraps of wood into a fun and educational toy… more

Sturdy, comfortable and easy: Why Faded Denim is the colour of November
Color Marketing Group (CMG) have announced the latest hue that… more

Pot luck: A DIY terracotta table to top off your space
Transform a humble terracotta pot into a stylish, sturdy table… more

Try this DIY outdoor bench for a charming rustic feel
If you’re looking for a way to spruce up your… more

Authentic style, effortless design: Transform your home with Muros Wall Panels
If you love the look of authentic stone, brick or… more


 look book